Thursday, March 31, 2011

2010 Wedding samples


Wedding Reportage


Wedding photography should encapsulate and preserve the essence of that one day, as experienced by the people that were there. Sounds obvious, but so much wedding photography is formulaic and recreated set pieces, even some contemporary reportage styles.

To record your wedding, our approach is simply to join your day, mingle, working with your guests - rather than barking instructions at them - and inconspicuously capture not just the key, but the fleeting, meaningful moments too. And that doesn't mean you can't have the obligatory family groups for Granny, just that it will be a less painful process and a more natural result.

You will have a documentary of your whole day, presented as a photo essay, made up of beautifully composed images in their own right.

Where your photo story begins and ends is up to you. All bookings are individual, not shoehorned into a fixed package, so we can start with the night before, and go right through to the end of the party, or just meet you at the ceremony for the main event only.


Jazz at Grahamstown festival


Wedding Photography 101 (Part 3)

by Natalie Johnson

Image by Deann Barrera

Work with what you are given

You can prepare for everything and every eventuality for a wedding, but the one thing you can’t control is the weather.

The optimum conditions for a wedding shoot is a slightly overcast day; producing bright, yet even light, which will not only flatter your couple and other subjects but allow you to record as much ambient light as possible, thus lowering ISO and resulting in sharper, cleaner frames. However, as controlling the weather is out of your hands, wedding photographers must learn to adapt to shoot in any environment.

Sunny day

Although the guests will adore a bright blue sky and hot sunny day, the photographer may secretly be praying for cloud cover. If you are confronted with a harshly lit day, bear in mind the best light will come in the morning and evening, so it could be a good idea to set off even earlier to get the bridal prep and location images in good light and if possible leave some of the romantic couple portraits until the sun lowers in the sky.

There are a few other tricks one can also use to counteract the harsh light, for starters move in closer to your subject, focus on details and if you can shade the subject in some way this will help to avoid shadows. Don’t be afraid to head in doors and position the couple next to a clean and ideally – veiled – window for softened light and even consider the use of a polarizing filter to cut out reflections and reduce contrast or flash to fill in the shadows when frames are backlight.

Furthermore, you can actually create some emotive silhouettes when shooting into the sun, simply position the couple between you and the sun so they appear in completely in shadow, this may mean that you need to move lower or to the side to get the best position. Another trick is to have the sun behind you and have the couple walk away hand in hand – perfectly lit. Remember to set a white balance according to the light conditions, or even bet learn to set it manually for completely accuracy and to recover details in a blown-out white dress when this is the focus of your frame underexpose the image by a stop or two.


Rainy Day

Image by Liliana

If it rains on your wedding day it is said to be lucky, but try telling that to a disappointed bride. As with harsh sun, there are a few ways around the rain and after a downpour it can even lend itself for naturally creating saturated colours and magnify details, which can be teased to greater effect with a polarizer – so as soon as there is a break in the shower grab your couple and quickly get those frames in the bag.

This is where your pre-shoot recce pays off, as hopefully before the shoot you visited the venue and identified places where you could photography romantic portraits and the all important group shots should this situation arise. Look for large windows indoors to position your couple next to and capture some evenly lit frames.

Use a flash for indoor captures, employing a diffuser to soften the harshness of the beam and also incorporate some if the ambient light. Finally if you do shoot outdoors in the rain, whilst your couple are positioned under the safety of a porch for example, use a raincover or at the least a plastic carrier bag, to protect your camera and lens and if it’s windy utilise a tripod ideally pulled down with your camera bag or a bag full of rock for extra stability. You could also ask a willing guest to hold the reflector and bounce any available light onto the couple for that extra degree of improvement.

Snowy Day

Image by Anna Jarske

Working in snowy conditions and cold temperatures will quickly deplete your camera and flash batteries so make sure you pack a few fully-charged spares and keep them as close to your body when not in use.

Whilst a snow-dappled churchyard will undoubtedly make for a beautiful setting, getting the right exposure can be a nightmare; underexpose and you’ll have a grey canvas, overexpose and you’ll lose those all important details. Take a few trial shots to correctly identify what settings work using the histogram for guidance, or bracket exposures.

Always set your white balance manually before you start and it is advisable to shoot in RAW if your camera allows it as this will provide you with more scope for adjustment at the post-production stage. When you and the couple are finished shooting outdoors, have a second camera already waiting for you indoors as the one you have just been using will need to be left in a safe area by the entrance – gradually being moved into the building in stages to allow it to warm up slowly to avoid condensation.


Read more: http://www.digital-photography-school.com/ready-wedding-photography-101-3#ixzz1IBocCFUS

Wedding Photography 101 (Part 2)

by Natalie Johnson

Lighting

Image by Pelipe

To truly master photography, not just the wedding genre, you will need to learn how light affects everything. Invest time in reading, training and experience to perfect techniques as on the day of the shoot you won’t have time to stop and think about what settings you need – you’ll need to understand the basic principles as well as the set up of your DSLR like the back of your hand.

Not only will the subject’s grow impatient but you could find yourself missing those all important ‘moments’ because you were too busy fiddling around in the settings menu.

Backing up

If you have time and the equipment on hand – back up your images onto a storage device, laptop or use built in wi-fi technology or a wi-fi card (such as the Eye-Fi memory card) to beam the images to your desktop. Whatever you do don’t format the cards until you have edited your frames and ensured everything is securely backed up across a handful of hard drives.

To limit the risk of losing files or shooting on a corrupt card on the day, take several medium capacity (2-8 GB) cards, perhaps even marking each for relevant parts of the day, for example: bridal prep, ceremony, reception and evening.

Your style and manner

Rather than be a jack of all trades it is advisable and perhaps even more lucrative to try and carve out a recognisable style and niche that shows what you are not only capable of but also enjoy doing. If your work is good and your style attractive, couples want to book you for their wedding day. You may need to alter this slightly as fashions change but always stick to what you enjoy creating and shoot in a style and manner that suits you.

Be up front about your style and your manner when the client books, but to make that sale you may also want to consider being flexible if the couple wants something which is outside your normal ‘remit’. Have everything you are providing the couple down in writing before the big day, set a fee with payments guidelines and deadlines – never forget this is a business transaction.

On the day be unobtrusive – this is their wedding – you are just there to record it and not ruin it. There are millions of wedding photographers out there but the ones who are really successful preach about the importance of politeness and respect. Yes be assertive and you will need to be as wedding photography is one of the most stressful jobs know to man, but do it with manners.


Remember the little things

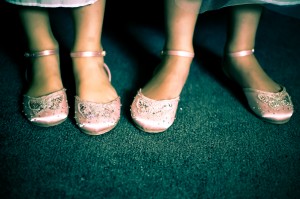
As well as capturing the important stages of the day such as: bride and groom preparation, the ceremony, romantic portraits, candids, group shots, speeches and the first dance, you should use any time between these events to record the smaller – yet hugely significant details; in essence – anything the bride and groom have spent time and money on choosing for their big day.

On your hit list should be: bridal accessories (such as jewellery, shoes, bouquets, bags, headwear and even underwear), table decorations, the cake, flowers, party favours, the seating plan, place settings, and even the bows tied to the seats used at the ceremony and reception venues. For creating a soft effect use a wide aperture such as f4 or 5.6 and crop in close using a fast lens.

Post production

As soon as you get back to your office, load the images straight into your computer and back them up on to the computer’s hard drive as well as several other portable external hard drives and online storage sites.

Using an editing suit such as Photoshop, Lightroom or one of the other thousand options available, delete any images which don’t meet the grade whether that be because they are out of focus, blurred, incorrectly exposed – beyond redemption, the subject is pulling an unattractive face or has their eyes shut etc. Next begin cleaning the image, tweaking exposure, brightness and contrast and/or adding filters you may like to use.

It is possible to run edits on multiple images at once, so check your software’s manual for advice. Load the final edit to an online library at low resolution for the couple to choose their favourites. With decision made make albums and send the couple the proofs. Administer any changes and then send the result off to the suppliers, which can then be returned to you or straight to your client. Most photographers estimate that after the wedding, the couple should receive their album within four to six weeks, however this ultimately depends on the volume of customers the photographer has, how quickly the suppliers can turn around products and how long the couple take to decide which frames they want.

Breaks

Wedding photography is hugely demanding mentally and physically, and it may be likely that you could end up working 12 hours without a break. Try to take five minutes when you can and get a soft drink to recover. Pack a few cereal or power bars and even a small tub of pasta to see you through the lulls as its unlikely you’ll get fed.


Read more: http://www.digital-photography-school.com/wedding-photography-101-2#ixzz1IBmEPLAG

Wedding Photography 101 (Part 1)

Preparation

Image by Sean Molin

One of the most important steps a wedding photographer can do before a wedding is prepare themselves for all eventualities. Firstly this means meeting with the bride and groom and setting in concrete what it is the couple want and don’t want so there can be no confusion down the line; this will also be the time to establish a fee and contract with the clients.

Next you should visit the ceremonial venue and reception venue a week or two ahead of time to mentally place where the romantic portraits and group shots can be taken. Take into consideration where the light will be coming from at the time of day you’ll be shooting (hence why you don’t want to do a reconnaissance mission too far ahead of time) and also have a contingency plan if the area doesn’t work for whatever reason, as well as having an indoor backup if it rains.

The day before the wedding, mentally run through everything the couple wants as well as any ideas you envisaged during your pre-shoot scout. Fully charge the camera and flash gun batteries and format memory cards. Insert these into your equipment the night before and take a few test shots to ensure everything is working as it should be. Prime your camera with the settings you expect to use at your first shoot – which will most likely be the bridal preparation.

Kit considerations

Although you’ll want to take a range of accessories for every eventuality it is a good idea to travel light. The minimum a photographer should pack in a medium size camera backpack is: a favourite DSLR and back up DSLR, a flash gun with diffuser, a reflector, several memory cards each holding a capacity of around 2-8GB, lens cloth, raincover or carry bag to protect your camera in the rain and a lightweight tripod. If you have the room, strength and skills you may also want to take a selection of lighting equipment, filters, a laptop, pocket wizards, remote controls and props.

Lens choices

In terms of lenses there are three types that we would suggest are essential for a wedding, but if you are doing this as a favour for a friend or for your own portfolio then you’ll be able to get by using one or two zooms that cover a wide focal range – for example 18-200mm would be ideal. However if you are looking to exert a more professional edge you should probably invest in a wide-angle lens for the group and location shots – ideally something like a 16-80mm zoom lens will be perfect and covers a range of bases.

It’s a good idea to invest in a prime lens for portraits and images of all the smaller yet hugely significant items such as: the rings, party favours, flowers, bridal accessories etc – so a 35mm, 50mm or 80mm would be ideal. Finally a healthy telephoto zoom lens will allow you to capture those spontaneous ‘moments’ that people treasure because they show the subject as being ‘real’ . Using a telephoto such as 55-200mm will allow the photographer to ‘snipe’ shots from a distance without being detected, thus the subjects are totally relaxed and the result will be completely natural.


Camera Settings

T

here are no hard and fast rules to adopt in terms of learning what aperture/shutter speed combination to use for which occasion, as it will largely depend on what quality and quantity of light is available at that time, as well as focusing more on the ‘moment’ rather than getting the right technique.However as a guide, many photographers generally prefer to use some of the following apertures as a rule of thumb, but you shouldn’t be afraid to try something different if it suits the style and purpose of what you want to achieve.Church and indoor ceremonial establishments can tend to lack enough natural light and as most venues won’t permit flash push the ISO as much as possible before it starts to degrade image quality and if appropriate consider using a tripod (just remember to turn the VR off if you do). Opt for a fast lens and don’t be afraid to use a wide aperture even as low as 1.4 or 2.8 to make the most of what light is there. Use the same aperture for the small yet significant items such as the rings and bridal accessories, thus softening the background but generating enough depth of field to render the subjects nice and sharp.F5.6 for candid shooting and the romantic portraits will again keep the subject in focus yet blur distracting background detail. However there are occasions when you might prefer to slip into shutter priority, for example to capture the bride throwing the bouquet or children chasing each other around the venue - for these occasions (depending on the light) a speed of 1/250 will lend itself for creating some charming results.Depending on the number of guests that the couple want to appear in the formal group shots, you’ll be best using an aperture of between f8 and f11 to keep everybody pin sharp – depending on the quality of your lens this may mean pushing the ISO or incorporating a tripod. For pulled back compositions of the couple within the venue grounds and location shots in general you’ll need an aperture of between f9 and f11 to keep everything in sight in focus.Finally for those end of the night dance images either use a long shutter (with some form of stability) to generate movement within the photo and for capturing waves of light from the DJ’s lighting rig, or employ a flash to freeze the action using an aperture of your choosing to compliment the effect you wish to achieve.


Read more: http://www.digital-photography-school.com/wedding-photography-101-1#ixzz1IBl7KoTT